
Sync or Backup to Amazon S3 Cloud Storage
|
For low cost offsite backup or a central point to synchronize computers in different locations a cloud storage solution is an ideal choice. The term "cloud" generally refers to a service that is somewhere on the internet and is very scalable up to any size that you require. Amazon offers a cloud service called S3 that is very good value for money, secure and robust because it replicates your data to prevent loss and corruption. You only pay for what you use and the storage space is effectively infinite. S3 is part of the Amazon Web Services (AWS). |
|
To get started is very simple:
1. Open an S3 service account with Amazon.
2. Login and get your security access keys.
3. Use
AJC Sync
to co connect to the S3 service and sync or backup from
your computers.
Following is a walkthrough in more detail:
1. Signup with Amazon S3
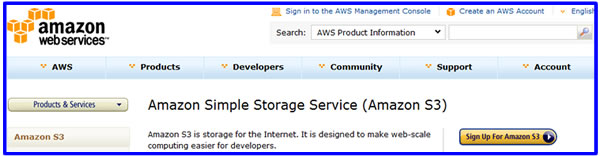
To read more about Amazon S3 and sign up click here . Don't worry that it says it is for developers because it can be used by anyone. It is not difficult to setup as I will show you here.
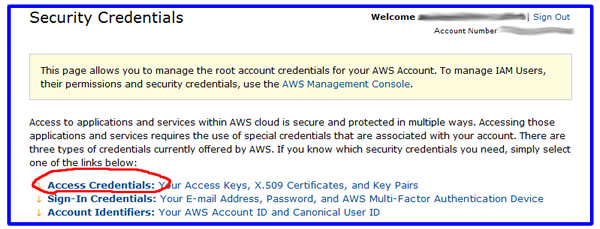
2. Login to Amazon AWS and get your access keys
When you have signed up go to your account details , locate your security credentials and click on your access credentials.
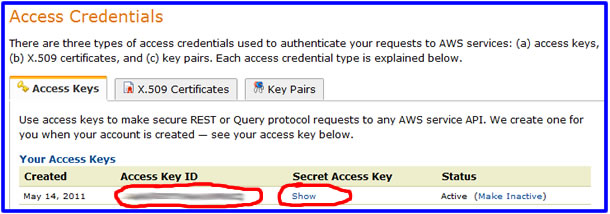
You need to take a copy of your Access Key ID and your Secret Access Key as you will need these to access your cloud storage area from AJC Sync .
3. Use AJC Sync to connect to your cloud storage and run a sync or backup
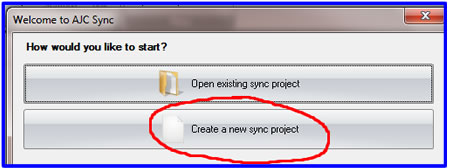
If you don't yet have AJC Sync you can download and install it from here .
Start AJC Sync and select Create a new sync project.
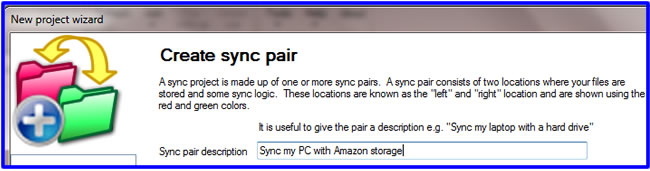
Create sync pair
You will then create a sync pair which defines the two locations that you want to keep in sync. Giving it a description will help you to remember what it does.
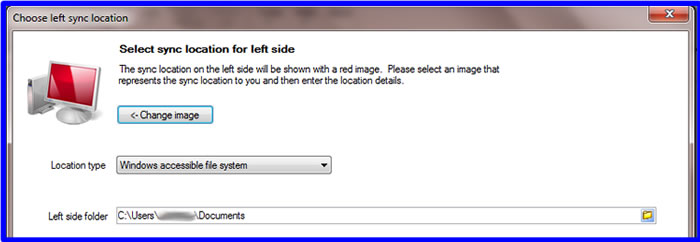
Choose left location
The two locations to keep in sync are known as the left and right locations and are colored red and green. First you must setup the left sync location and here the Windows documents folder has been selected. You can change the graphic image to give you a visual representation of the location.
Choose right location
Then you must setup the right sync location and select the Amazon S3 cloud storage option. Enter your access keys and click Connect.
You must select a Bucket name to store your files on, you can think of this as a drive. If you have not created any buckets yet or want to edit the buckets you can click on the Amazon AWS Console button to take you to Amazon's web site to set these up.
If you don't want to use the root folder in the bucket you will then need to choose a Folder by clicking on the little yellow folder button. Here the Documents folder has been selected.

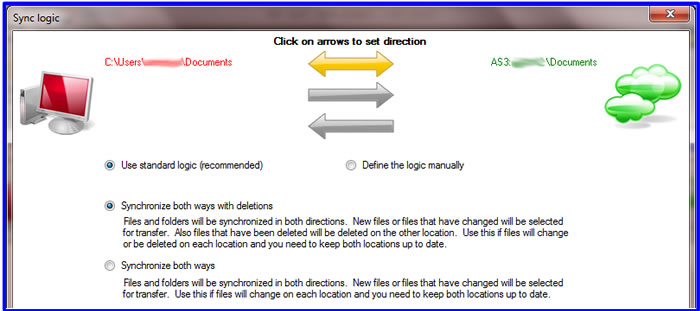
Setup sync logic
You will then proceed to choose your sync logic which can be a one way or two way sync.
AJC Sync home tab
Once the project has been setup you will see the main AJC Sync screen Home tab. As this point it is a good idea to save your project.
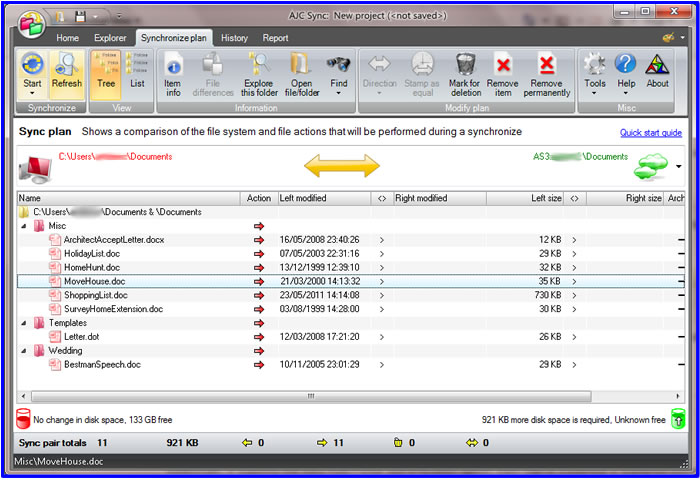
Click on the Plan button to create a sync plan to see what files and actions will be performed to sync the two locations.

Synchronize plan
The sync plan shows what will happen to your files and is color coded. The red color here indicates the files only exist on the left side and the arrows indicate they will be copied from left to right, from Windows disk to Amazon S3 storage.
You click the Start button to start the transfer.
You don't need to look at the sync plan every time once you are confident you have set it up correctly and you can easily schedule syncs.
This was a very brief overview of AJC Sync covering just some of its capabilites and only showing the manually controlled sync. You can do unattanded and scheduled syncs and much more. Please download a trial version and give it a go for yourself.